Automatic pet food dispensers promise steady portions, cleaner routines, and fewer missed meals. Yet a jammed unit can leave kibble trapped above the bowl while your pet waits nearby. The problem is usually mechanical, not mysterious. Oversized food, oily coatings, humidity, or a weak battery can interrupt the dispensing path. Sometimes, the feeder design itself is partly responsible.
The American Pet Products Association reported that 66% of U.S. households owned a pet in its 2023–2024 National Pet Owners Survey. Its 2024 State of the Industry report also valued U.S. pet spending at approximately $152 billion. These figures show why feeding equipment deserves careful, evidence-based attention. More households depend on automated routines, especially when work schedules change. Still, convenience should not replace daily observation. A machine can fail quietly.
This guide explains how to fix jammed pet food dispenser problems through safe inspection and practical troubleshooting. You will learn how to check the hopper, chute, rotor, power supply, and portion settings. Start gently. Do not force the motor or insert sharp tools into moving parts. A small flashlight can reveal compacted crumbs around the outlet. Removing food, drying the chamber, and testing a small portion often restores normal operation. However, not every jam is user error. I have seen owners overlook warped components, damp kibble, and confusing programming menus. That deserves honest reflection. If the feeder repeatedly stalls, overheats, or dispenses inconsistent portions, stop using it and contact the manufacturer. Your pet’s feeding pattern matters more than the device’s convenience.
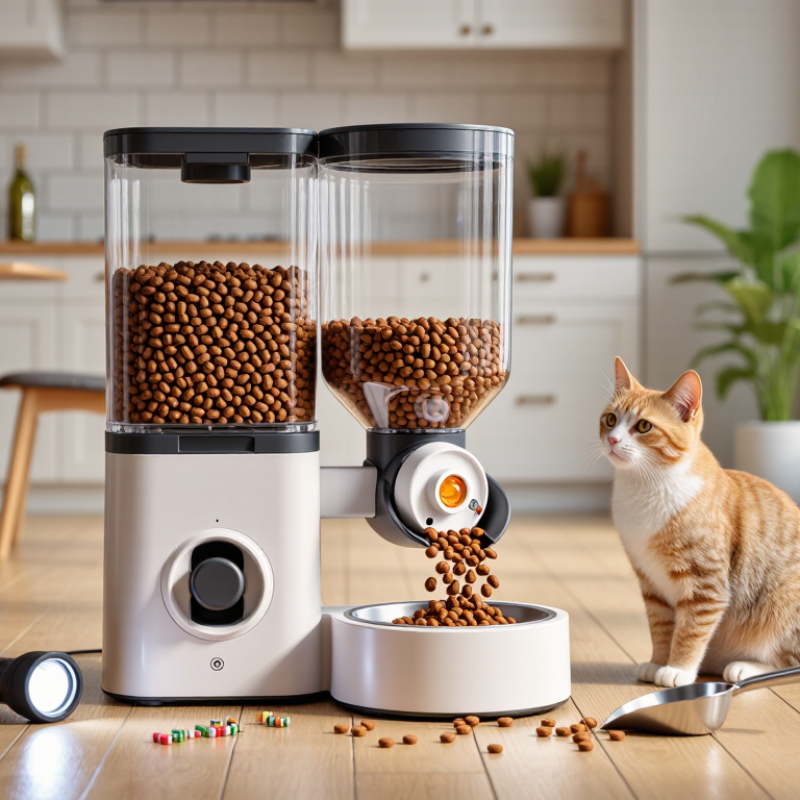
Why Is My Pet Food Dispenser Jammed and How to Fix It?
Identify Hopper, Auger, or Outlet Blockages Before Unplugging the Unit
A jammed pet food dispenser usually has a blockage in the hopper, auger, or outlet. Watch the dispenser during its next scheduled cycle, without touching moving parts. If food sits still in the hopper, compacted kibble may be preventing the auger from receiving enough pieces. A narrow bridge can form above the screw, especially when food is oily or unevenly shaped. Tap the hopper lightly from the outside. Do not force food downward with your hand.
If the motor hums but food does not move, suspect the auger. Check for broken pieces, dust, or an oversized treat wedged along its channel. A clicking sound may indicate that the auger is meeting resistance. If food moves through the auger but stops at the outlet, inspect the dispensing chute for a tight plug. Small fragments can harden there over time. That detail is easy to miss.
Power off now.
Disconnect the unit before removing the lid, auger, or chute. Use a dry brush or the cleaning tool supplied with the dispenser. Avoid sharp metal objects, which can damage plastic surfaces or leave fragments behind. I once blamed the motor, but the real problem was damp food near the outlet. After clearing the obstruction, rotate the auger gently by hand, if the design allows it. Refill with clean, dry food and test one small portion. If jamming returns, record the food size, sound, and location. That evidence helps a qualified technician diagnose wear or alignment problems.
| Inspection Area | Common Signs | Likely Cause | Safe Fix | Prevention |
|---|---|---|---|---|
| Hopper | Food remains in the bin, but little or none reaches the dispensing mechanism. | Kibble is bridging across the hopper opening, packed by moisture, or too large for the feeder opening. | Stop the dispenser and disconnect power. Empty the hopper, remove compacted food with a dry utensil, and check that the opening is clear. | Keep food dry, avoid overfilling, and use kibble within the size range stated in the operating instructions. |
| Auger or Dispensing Screw | The motor hums, clicks, or stops while the screw turns slowly or not at all. | A piece of kibble, treat, or foreign material is lodged between the screw and its housing. | Unplug the unit before touching the auger. Remove accessible debris with a soft brush or wooden utensil; never force the screw or use metal tools near plastic parts. | Inspect the auger during routine cleaning and do not mix oversized treats with regular kibble. |
| Outlet Chute | The dispenser sounds normal, but food collects behind the dispensing outlet. | The chute is blocked by compacted kibble, crumbs, or food residue. | Disconnect power, remove the food container if possible, and clear the chute with a dry brush. Wipe away residue only after the part is removed from the powered base. | Clean the outlet regularly and keep the dispensing path free of crumbs and damp food. |
| Food Condition | Kibble feels soft, oily, swollen, or sticks to the sides of the hopper. | Humidity, condensation, or food oils have caused pieces to clump together. | Empty and dry the hopper completely. Discard contaminated or spoiled food and refill with fresh, dry kibble. | Store food in a sealed container and do not add new food on top of old residue. |
| Container and Lid | Food flow changes when the lid is pressed, moved, or removed. | The container is misaligned, the lid is pressing on the food, or the hopper is filled above its intended level. | Remove power, reseat the container, confirm the lid closes without compressing the food, and fill only to the marked level. | Check that removable parts are correctly positioned after every cleaning. |
| Power and Motor | There is no sound, the display is off, or the motor stops immediately after starting. | The power adapter is loose, the outlet is not supplying power, or the motor protection has activated after a jam. | Clear all food blockages first, reconnect the adapter securely, and test another suitable outlet. Stop using the unit if it smells burnt or becomes unusually hot. | Keep the adapter and cable dry, and do not repeatedly restart a visibly jammed mechanism. |
| After Clearing the Jam | The dispenser operates, but portions are inconsistent or the jam returns quickly. | Residual crumbs remain in the mechanism, the food size is unsuitable, or a component may be damaged. | Reassemble dry parts correctly and run one supervised test portion. Stop testing if grinding, burning, or repeated jamming occurs. | Follow the cleaning schedule and seek qualified service when the mechanism remains obstructed or damaged. |
Common causes include compacted kibble, dust, oily crumbs, oversized pieces, or a misaligned auger. Food can form a bridge above the screw. A full hopper may still hide a blockage.
Watch the next scheduled cycle without touching moving parts. Food sitting in the hopper suggests a bridge. A humming motor with no movement points toward the auger. Food stopping at the chute suggests an outlet plug.
Switch it off and disconnect the power. Remove the lid only after moving parts stop completely. Do not force food downward with your fingers. Power off now.
Empty the hopper first. Use a dry, soft brush or the supplied cleaning tool. A blunt wooden stick may loosen compacted pieces carefully. Avoid knives and sharp metal objects.
Yes. Dry kibble commonly contains about 10% moisture. Humid air can make pieces swell, soften, and stick together. Store food in a sealed container. Keep the dispenser away from sinks, steam, and sunlight.
Inspect the auger channel for broken pieces, dust, or oversized treats. Check the chute for hardened fragments and sticky residue. Rotate the auger gently by hand, if permitted by its design. Never force the motor.
Reassemble it carefully without tightening the cover too early. Run one small portion using the usual food. Then test several cycles into a paper cup. Weigh portions with a kitchen scale.
Repeated clicking, stalling, hot smells, or uneven portions need attention. Record the food size, sound, and blockage location. One successful cycle fooled me. It does not prove the repair worked. Contact a qualified repair service if jams continue.
A jammed pet food dispenser is often caused by an obstruction in the hopper, auger, or outlet. Before unplugging the unit, inspect these areas carefully and identify where kibble has stopped moving. Check whether the food’s size and shape match the manufacturer’s recommended range, since oversized, irregular, or sticky pieces can interrupt the dispensing mechanism. Humidity is another common factor: dry kibble typically contains about 10% moisture, but exposure to damp air can make pieces swell, clump, or lose their free-flowing texture. These checks help explain how to fix jammed pet food dispenser problems safely and efficiently.
After clearing the blockage, remove and sanitize all food-contact components according to applicable hygienic practices, including the principles outlined in FDA 21 CFR Part 507. Allow parts to dry fully before reassembly. Finally, test the dispenser with a small amount of food, checking the flow, portion accuracy, and motor load. If the motor strains, portions remain inconsistent, or jamming returns, stop operation and inspect for remaining debris, incompatible kibble, or worn components.

 MXI Paws